
This week’s Photography Tip Tuesday focuses on using natural light in an indoor setting. In my studio, I have the option of using natural light as well as studio light. I switch between the two quite a bit during a session to change up the scenery, although the quality and look of the two light sources looks very similar in my images. I, by no means, know all there is to know about this subject; however, I can provide a few tips that I have found to be helpful in using natural light indoors (basically a trial and error over the past five years!). *contains affiliate links, meaning if you click on and purchase the products linked in the post, I get a small percentage…enough to buy a latte, but not enough for a new camera :)*
- Set your Custom White Balance.
- This can be done several different ways. I typically use a Gray Card when setting a custom white balance indoors. Other times, I’ll use the Kelvin settings in my Canon EOS 5D Mark III . You could also use an ExpoDisc . It all depends on personal preference, but setting your white balance in the beginning can save you hours of post processing!.
- Locate your natural light source.
- Big windows are the obvious and most beautiful choice for natural light. My studio has one big window that I use for my natural light. Find your best light source, and position your subject near it. Below is a picture of a small section of my natural light studio space taken with my iPhone to give you an idea.
-
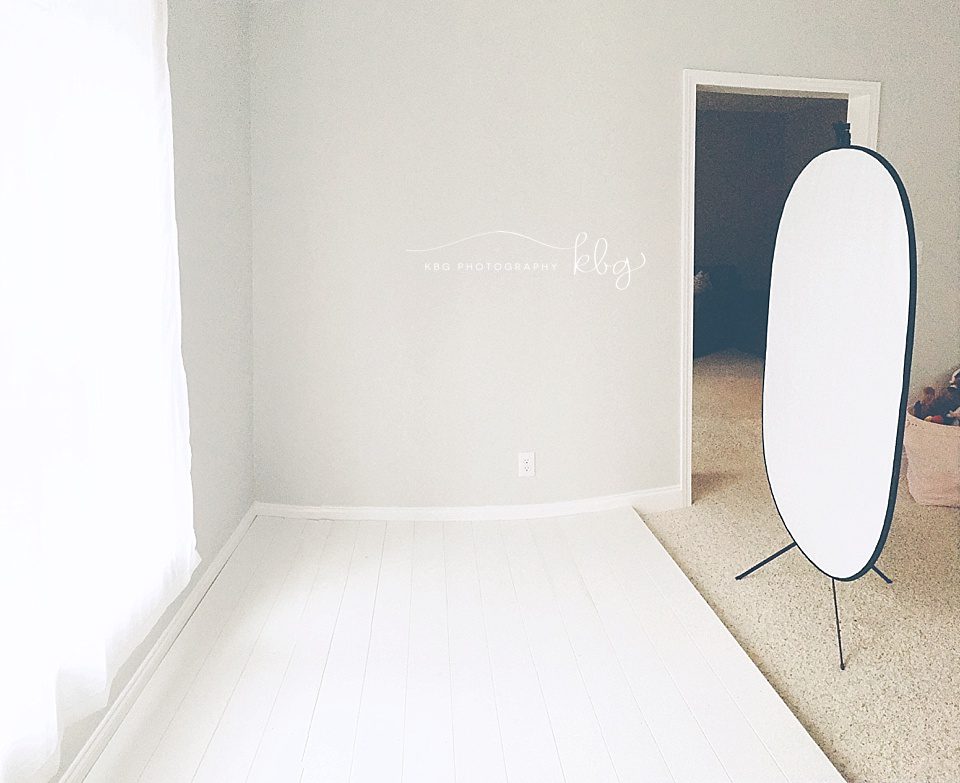
(iPhone photo)
- Turn off all other light sources.
- Once you’ve located the natural light source that you want to use, turn off all artificial light near by…like ALL of them. Even overhead or artificial light from the next room over can spill into the frame causing white balance and exposure issues. Artificial lights in a home tend to be very warm and can lead to your image having yellow and orange color casts, not to mention unwanted shadows.
- Watch for harsh window light.
- The sun is at different angles at different times of the day, so make sure that you pay attention to where the sun is in relation to your window light when you are shooting. If the light is coming directly into the window producing harsh light, cover the windows with a sheer curtain or fabric to diffuse the light. My studio faces South, so I never have harsh light that comes directly into the window; however, if yours does, you can figure out the best time for the best light in your space and time your shoot accordingly.
- Pay attention to your background.
- Sometimes this rule isn’t necessary, but backgrounds can distract from the subject if they are too busy…which is why you’ll never see me shoot in my kitchen unless I have time to clear the clutter (okay, so you’ll never see me shoot in my kitchen 🙂 !). Tip #6 can help combat this issue.
- Shoot with a wide aperture.
- Your aperture will determine how much of your subject will be in focus, as well as how much light will hit the sensor to expose your image. If you shoot with a wide aperture (I usually aim for 2.2-2.8 when shooting a single subject indoors), you will allow the background to blur, thus having your subject stand out more. This is a good way to “hide” a more cluttered background. A wide aperture also helps properly expose the subject when the natural light is not as abundant as it typically is when shooting outdoors.
- Bump up your ISO if necessary.
- Just like using a wide aperture will help properly expose your subject if the light inside isn’t very abundant, a higher ISO will also help this cause. Remember, a properly exposed image with a high ISO will still have less noise than an underexposed image with a lower ISO. Therefore, don’t be scared to bump up the ISO to properly expose the image. I’ve shot sessions in client’s homes at 3200 and up and have had no issues as long as I don’t underexpose the image.
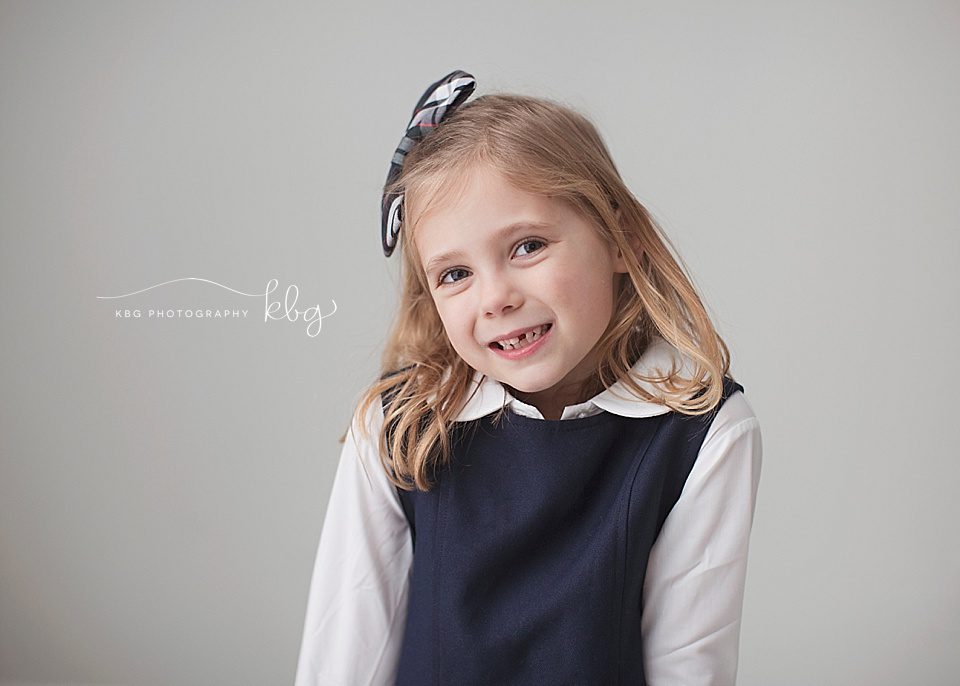
- Angle of the subject.
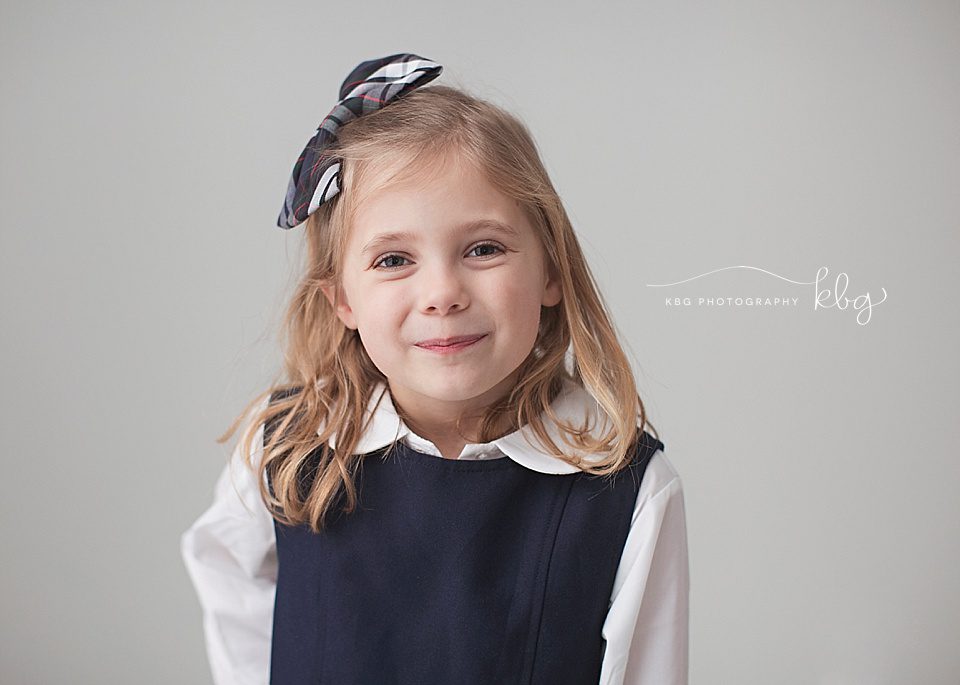
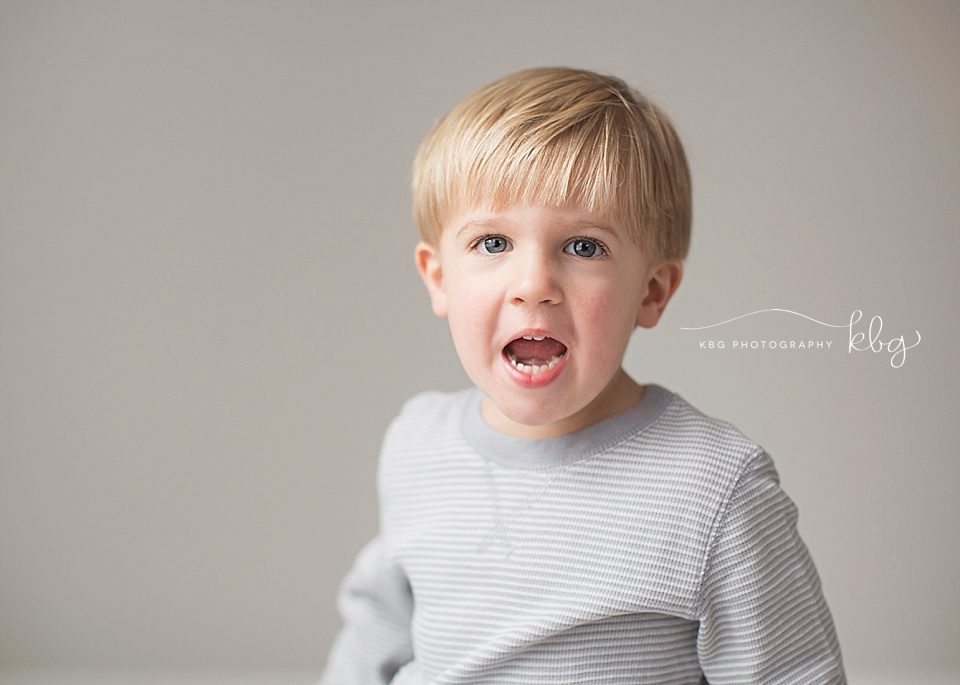
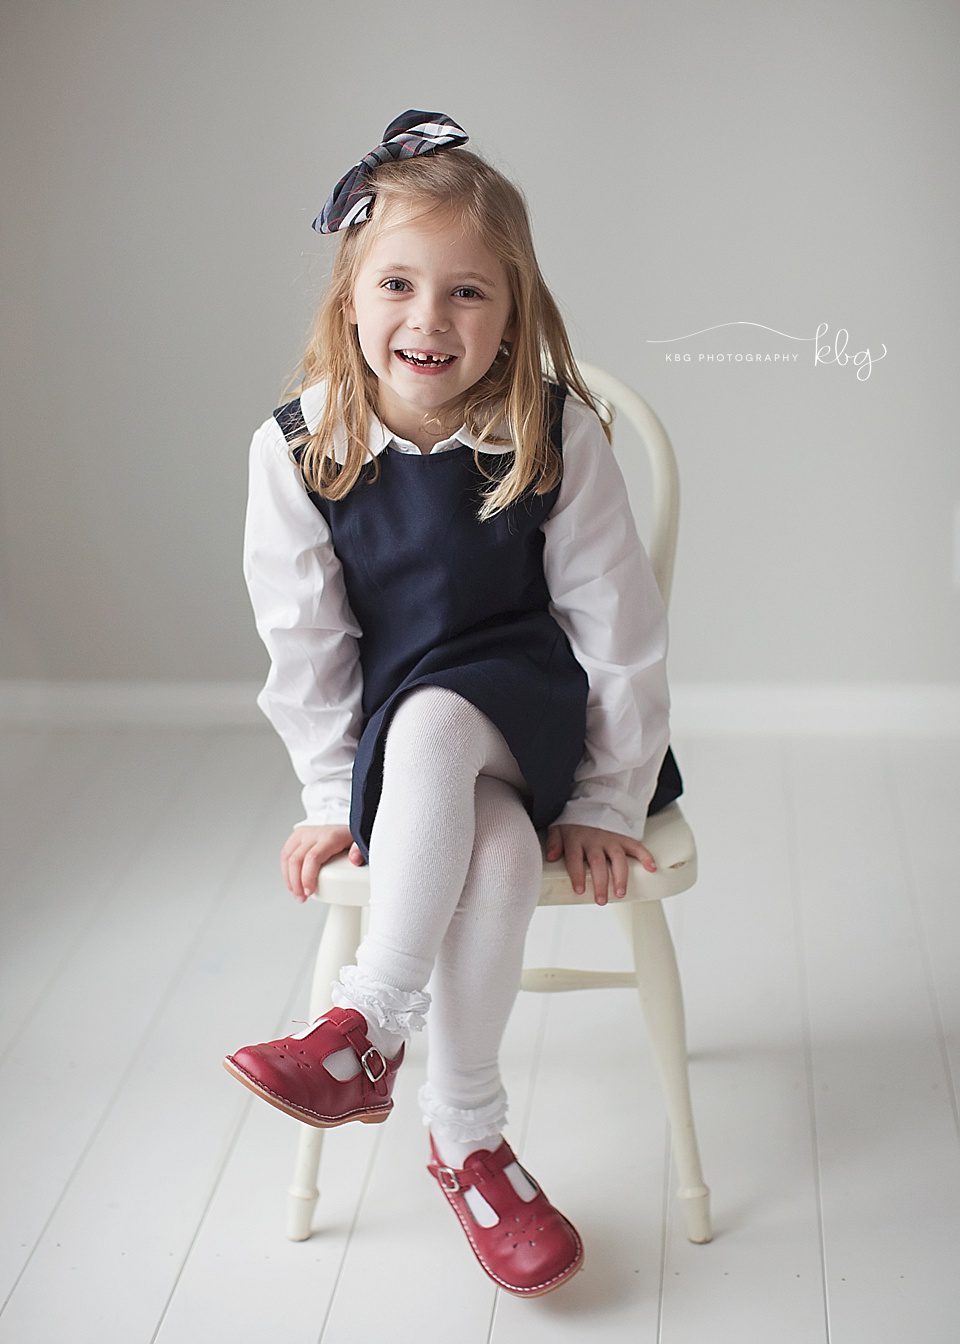
- When using natural light in my studio, I like to use side lighting. My big window is to the right of my subject, and I have a big reflector
 to the left of my subject to cut down on the harsh shadows on the un-lit side. On occasion, I will use my big window for backlighting, meaning I place my subject directly in front of the big window facing me. When backlighting your subject, make sure to meter for exposure on your subject, not the window. This will allow the camera to read a proper exposure for your subject as to not underexpose them. I try to stay away from front lighting (meaning that the light source is directly in front of the subject), because it is less-interesting, more flat lighting. Images with different dimensions of light and shadows tend to product more interesting results. Different photographers have different shooting styles, this is just my typical style.
 - Side Lighting:
-
- Back Lighting:
- Front Lighting:
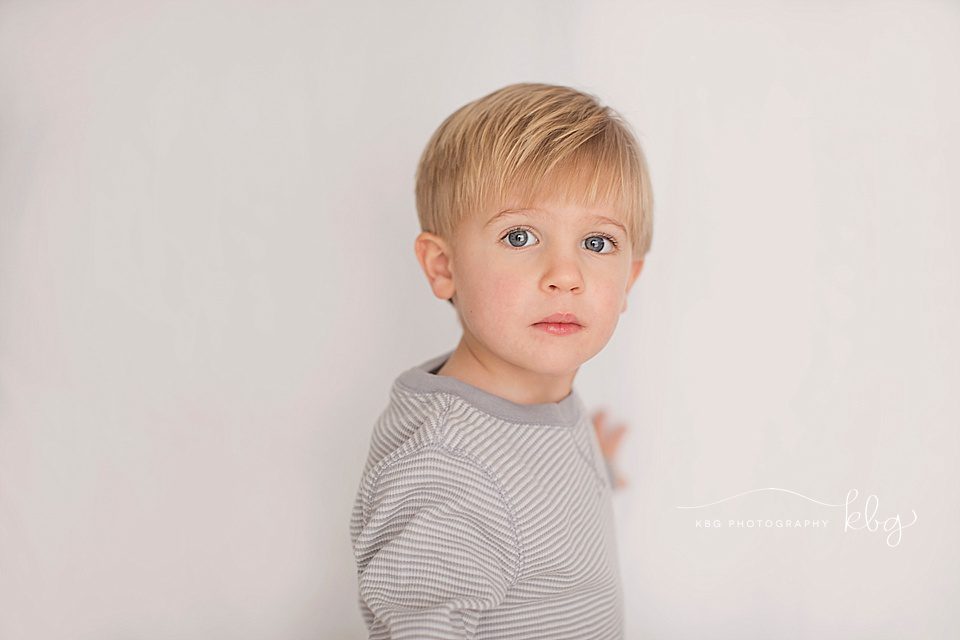
- When using natural light in my studio, I like to use side lighting. My big window is to the right of my subject, and I have a big reflector
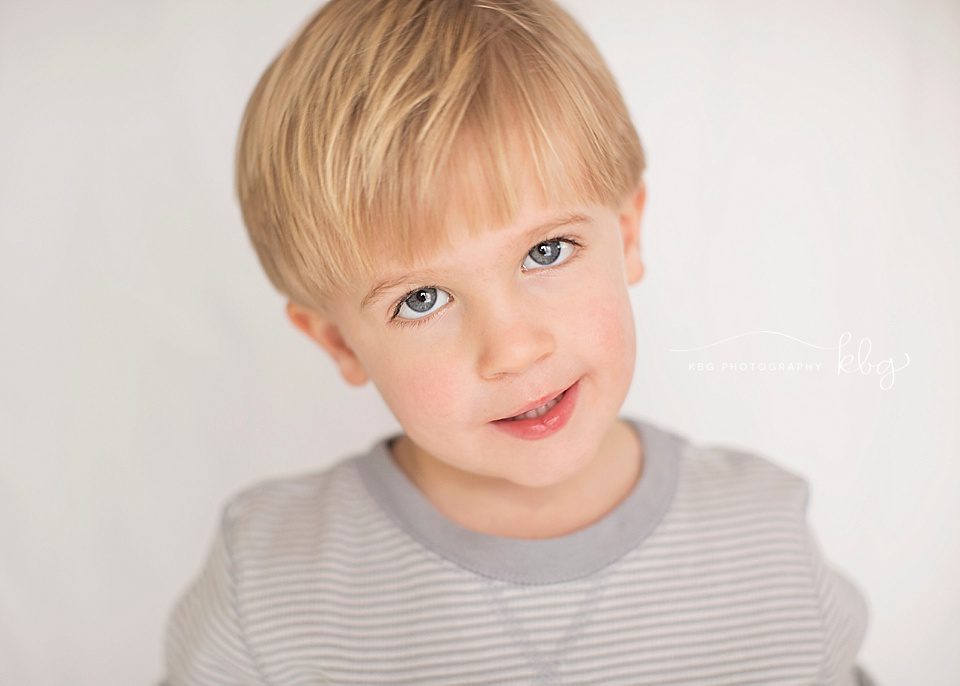
- Look for Catch Lights
- What are catch lights? Catch lights are those bright spots in your subject’s eyes in the image. They are the reflection of your light source in the subject’s eyes, and they give them a “twinkling” feel.
- Get Creative.
- Look around your house, and find natural light sources to experiment with. It doesn’t have to be a big, fancy window; it can be a window on a counter by the sink, in the door frame, etc. Have fun playing around with natural indoor light!

KariBeth, owner and photographer of KBG Photography, is a proud member of NAPCP (National Association of Professional Child Photographers) and is based out of the Northwest Atlanta, Georgia area. KBG Photography primarily serves, but is not limited to the following cities: Marietta, Kennesaw, Acworth, Powder Springs, Smyrna, Vinings, Roswell, and Atlanta.


